|
Getting your Trinity Audio player ready...
|

By Gwen Payne
For homeowners in older houses, first-time homes, or recently purchased fixer-uppers, winterization neglect can show up fast once temperatures swing and snowmelt starts moving. The hard part is that winter weather damage often looks small at first, while the cold weather impact keeps working behind walls, under floors, and around roofs in unprepared homes. That uncertainty can trigger rushed decisions or delayed repairs, both of which raise the odds of bigger, more expensive problems. With calm, timely seasonal home maintenance and clear priorities, most homes can be stabilized and protected before damage spreads.
article continues after advertisement

Quick Summary: Repair Winter Damage Safely
- Start by following key safety precautions before entering damaged areas or using ladders and tools.
- Start by completing a simple damage assessment checklist to spot urgent issues and document problems.
- Start by making quick temporary fixes to limit water, heat, and structural damage.
- Start by using clear decision points to know when repairs are DIY versus professional work.
- Start by prioritizing immediate winter damage repairs to protect your home and prevent worsening damage.
Assess, Patch, Weatherproof, and Escalate Wisely
Here’s one practical way to move from damage to protection.
This walkthrough helps you find common winter damage, stop it from getting worse, and make simple repairs you can handle safely. It matters because quick containment and smart weatherproofing can prevent small issues from turning into expensive surprises.
- Step 1: Do a careful whole-home walkaround
Start with a slow exterior and interior scan, looking for ice-related gaps, damp spots, peeling paint, new stains, and drafts. Pay special attention to basement walls, crawl space walls, and the foundation’s exterior surfaces because shifting and water intrusion often show up there first. Take photos and notes so you can track what’s getting worse. - Step 2: Contain active water and moisture immediately
If you see dripping, pooling, or wet drywall, focus on control first: move belongings, catch drips with buckets, and dry the area with fans if it’s safe. Use a temporary barrier like plastic sheeting and towels to keep water from spreading into floors and walls. If you suspect electrical contact or sewage backup, stop and call a pro. - Step 3: Patch small air leaks and insulation gaps
Seal obvious drafts around doors, windows, and pipe penetrations using weatherstripping, caulk, or foam where appropriate. Replace or re-seat loose insulation in accessible areas like attic hatches or basement rim joists, keeping it clear of heat sources. These small patches reduce heat loss and lower the chance of frozen pipes returning. - Step 4: Add temporary weatherproofing where exposure is highest
Cover cracked window panes with shrink film or clear plastic, and use door sweeps to block wind at thresholds. Clear ice dams and packed snow only where you can do so safely from the ground, and keep downspouts aimed away from the foundation to reduce pooling. Build a maintenance rhythm by following a gutter cleaning schedule so meltwater has a clear path away. - Step 5: Decide what needs a professional repair
Call for help if you find sagging ceilings, widespread moldy smells, recurring leaks, cracked masonry, or any signs of structural movement. Also escalate when the fix requires roof work, gas lines, major electrical, or anything you cannot inspect safely without a ladder or confined-space entry. Your photos and notes make it easier to get accurate quotes and faster repairs.
Small steps today make your home easier to keep warm, dry, and stable all season.
article continues after advertisement

Common Winter-Damage Repair Questions, Answered
If you’re feeling overwhelmed, start with what’s safest and most controllable.
Q: What are the first steps I should take to assess winter damage around my home safely?
A: Begin with a daylight walkthrough using gloves, sturdy shoes, and a flashlight, and avoid icy ladders. Shut off power to any wet area before you get close, and pause if you smell gas or see sagging. Inside, look for stains on ceilings or walls, then take photos so you do not have to rely on memory.
Q: Which winter-related repairs can a homeowner reasonably attempt without professional help?
A: Many homeowners can handle draft-stopping tasks like weatherstripping, caulking gaps, replacing a furnace filter, and reattaching loose downspouts. Basic tools that help most are a headlamp, utility knife, caulk gun, adjustable wrench, and a moisture meter if you have one. Keep projects small and reversible to reduce stress and avoid making hidden damage worse.
Q: How can I temporarily patch roof leaks or broken pipes until permanent repairs can be made?
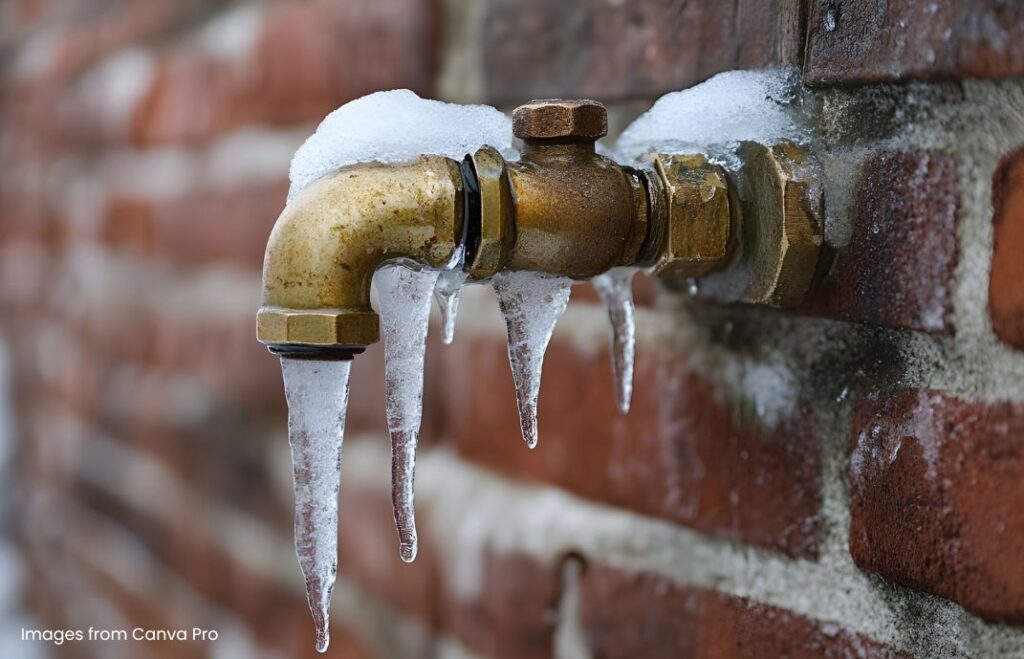
A: For a roof drip, catch water, poke a tiny drain hole in a bulging ceiling spot only if it is safe, and cover the area with plastic to protect floors. For a frozen or burst pipe, shut off the main water valve, open faucets to relieve pressure, and wrap the damaged section with rubber and hose clamps as a short-term bandage. Dry the area fast with fans to limit swelling and mold.
Q: What signs indicate when I should stop DIY efforts and call a professional repair service?
A: Stop if water is near electrical wiring, you see ceiling sag, you suspect mold over a wide area, or the leak returns after a patch. Also, call if a “simple” fix turns into repeated drywall crumbling, since the average national price is often measured per square foot and can add up quickly when moisture spreads. When safety is uncertain, getting help is the most cost-controlled choice.
Q: How can a home repair expert assist me if I didn’t winterize and now face extensive cold-weather damage?
A: A pro can trace the true source of leaks and drafts, document moisture levels, and plan repairs in the right order so you are not paying twice. If HVAC was affected, describe symptoms and use parts categories like thermostat, air handler, condensate line, flue vent, and ductwork when you call, and reviewing types of HVAC parts and components can help you keep those categories straight. Clear access to shutoffs and equipment, then share photos and notes so estimates are faster and less stressful.
You’re not behind, you’re taking control with clear, doable decisions.
Post-Winter Damage Action Checklist

To stay organized today:
This checklist turns scattered concerns into a clear order of operations so you can stabilize your home fast and avoid repeat damage. Use it to decide what to fix now, what to monitor, and what to hand to a pro with solid documentation.
✔ Document damage with photos, timestamps, and a running notes list
✔ Shut off water or power to any wet, risky area
✔ Stop active leaks with buckets, plastic sheeting, and fast airflow
✔ Check attic, ceilings, and walls for new stains, soft spots, or odors
✔ Inspect windows and doors for drafts using inspect windows and doors
✔ Clear gutters, downspouts, and splash blocks to move meltwater away
✔ Schedule pros for sagging ceilings, recurring leaks, or suspected mold spread
Small, steady fixes add up quickly.
Turn Winter Damage Repairs Into a Simple Maintenance Routine
Winter can leave a home looking fine at first glance, yet hiding leaks, drafts, and small failures that feel overwhelming to sort out. The steady path is the one you’ve followed here: practical homeowner guidance that prioritizes safety, documents what you see, and turns managing winter home damage into proactive home care instead of panic. When you work this way, the urgent items get handled first, surprises shrink, and decisions become clearer, whether you DIY or call a pro. One small repair now prevents a bigger repair later. Choose one fix this week, take before-and-after photos, and jot a short note for long-term maintenance planning. That simple habit protects comfort, health, and your home’s resilience season after season.
Gwen Payne
Gwen Payne is a stay-at-home mom with an entrepreneurial spirit. Over the years, she has mastered raising her two daughters while side hustling to success through small ventures based on her passions – from dog walking to writing to E- commerce. With Invisiblemoms.com, she hopes to show other stay-at-home parents how they can achieve their business-owning dreams.
